Welcome to the wonderful world of art. If you have ever looked at a flat drawing and wondered how to make it pop, you are in the right place. The secret lies in using different shading techniques. Shading is what gives an object shape, depth, and weight. Without it, a circle is just a flat line on a page. With it, that circle becomes a heavy, round ball that looks like you could pick it up. Learning these methods is like gaining a superpower for your hands. It takes practice, but anyone can do it with the right steps. In this guide, we will explore how to move your pencil to create shadows and highlights that look amazing.
Shading techniques are the foundation of all great realistic art. When you master them, you stop just drawing lines and start creating forms. Think about how the sun hits a tree or how a lamp lights up a room. There are dark parts and bright parts everywhere. By mimicking these light patterns on paper, you trick the eye into seeing 3D shapes. It is a very relaxing process once you get the hang of it. You do not need fancy tools to start. A simple pencil and a piece of paper are enough to begin your journey into the world of light and shadow.
Understanding Light and Shadow
Before you move your pencil, you must understand how light works. Every shadow has a reason for being there. When light hits an object, the side facing the light is bright. The side away from the light is dark. This is the most basic rule of shading techniques. You also have a cast shadow, which is the dark shape the object throws onto the ground. Paying attention to where your light source is located will help you decide where to put your darkest tones. If you keep your light source in one spot, your drawing will look much more professional and consistent.
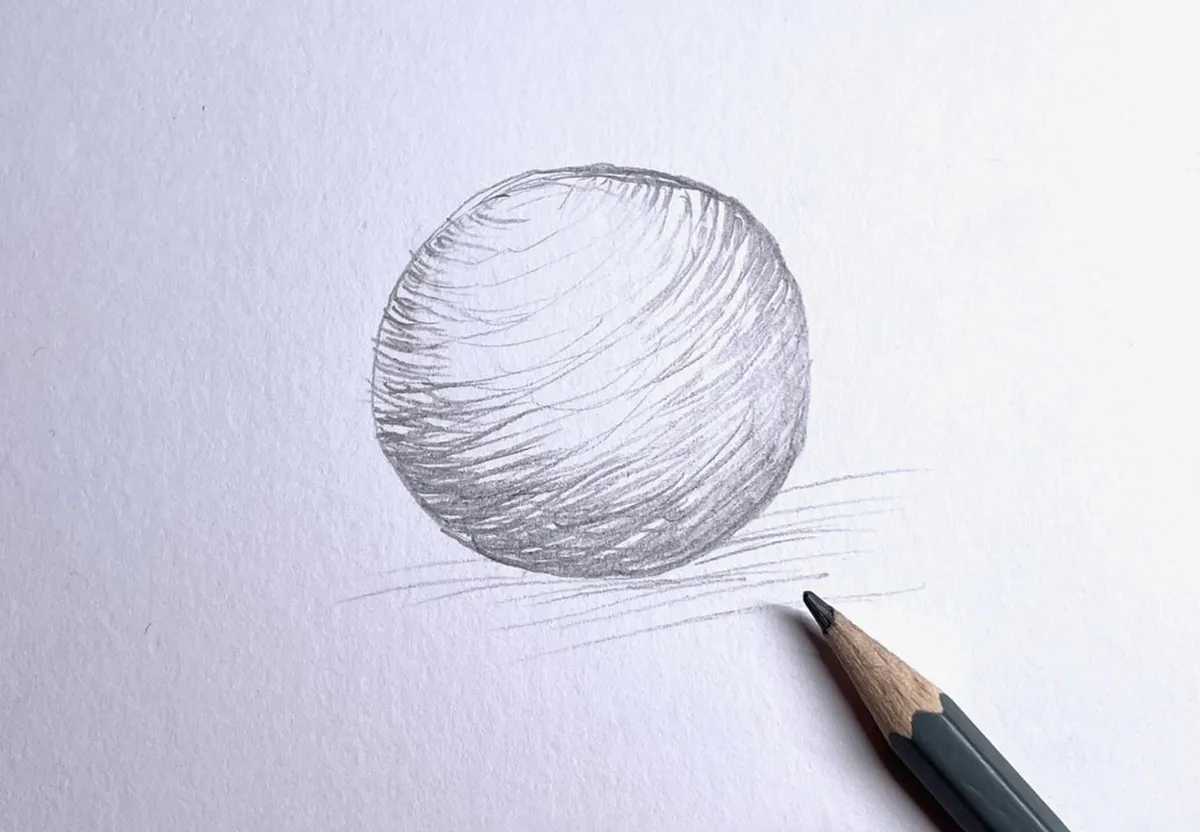
The Power of Hatching
Hatching is one of the simplest shading techniques you can try first. It involves drawing many parallel lines close together. When the lines are far apart, the area looks light. When you move them closer together, the area looks darker. This method is great because it is fast and looks very clean. Many famous artists use hatching in their sketches to show form quickly. It works best with pens or sharp pencils. You just keep your lines going in the same direction to create a smooth transition from light to dark areas on your paper.
Cross Hatching for Deep Texture
If you want to make your shadows look even deeper, you can use cross hatching. This is very similar to regular hatching, but you add a second layer of lines. These new lines cross over the first set at an angle. This creates a grid pattern that builds up value very quickly. It is one of the best shading techniques for creating texture. You can use it to draw fabric, rough stones, or even skin. The more layers of crossing lines you add, the darker the shadow becomes. It gives your artwork a very classic and detailed look that catches the eye.
Using Stippling for Fine Detail
Stippling is a unique way to shade using only tiny dots. Instead of drawing lines, you tap your pen or pencil on the paper many times. This is one of the most patient shading techniques, but the results are beautiful. If you put the dots very close together, it looks like a solid dark shadow. If you spread them out, it looks like a soft highlight. Stippling is perfect for drawing things with a grainy texture, like sand or soft fruit. It allows for a very slow and controlled change in tone, making your art look very delicate and refined.
The Art of Blending and Smudging
Blending is perhaps the most popular of all shading techniques for beginners. This involves applying a layer of graphite and then using a tool to smooth it out. You can use a blending stump, a tissue, or even a soft brush. This removes the visible pencil lines and creates a very soft, photographic look. It is excellent for drawing smooth surfaces like a shiny car or a person’s face. You have to be careful not to over-blend, or the drawing might look messy. Keeping some sharp edges helps maintain the shape of your object while the shadows stay soft.
Circulism for Smooth Skin Tones
Circulism is a special way of shading where you draw many tiny, overlapping circles. It is one of the more advanced shading techniques used by portrait artists. Because the circles are so small and layered, they create a very even texture that looks like skin. It is much better than just rubbing the pencil back and forth because it does not leave harsh streaks. You can build up the darkness slowly by going over the same area multiple times. This method helps you capture the subtle curves of a face or the soft muscles of an athlete.
Contour Shading to Show Shape
Contour shading is all about following the curves of your subject. Instead of straight lines, you draw lines that wrap around the object. If you are drawing an apple, your shading lines should be curved like the apple itself. This is one of the essential shading techniques because it describes the physical form of the object. It tells the viewer exactly how the surface bends and turns. Even without a lot of blending, contour lines make a drawing look three-dimensional. It is a great way to practice seeing the world as a set of rounded volumes.
Creating Value Scales
A value scale is a tool that helps you see different levels of darkness. To make one, draw a long rectangle and divide it into five or ten boxes. Start with white on one end and make each box slightly darker until the last one is pure black. Using this tool helps you master your shading techniques by showing you the full range of your pencil. Many beginners are afraid to go dark enough. A value scale reminds you to push those shadows so your drawing has high contrast. High contrast makes your art look bold and exciting instead of gray and dull.
The Importance of Highlights
While we focus on shadows, highlights are just as important. A highlight is the brightest spot on an object where the light hits directly. In many shading techniques, you create highlights by leaving the paper white or using an eraser to pick up lead. These bright spots make objects look shiny or wet. For example, a small white dot on an eye makes it look alive. Without highlights, your shading might look heavy and flat. Balancing the darkest blacks with the brightest whites is the key to making your artwork stand out and feel real.
Professional Standards and Business Connections
In the professional art world, understanding these methods can lead to big opportunities. Companies like Forbes often highlight successful entrepreneurs in the creative industries who have turned these basic skills into massive design firms. High-level illustrators use these same shading techniques to create concept art for movies and video games. Being able to explain and use these methods shows that you have a high level of expertise. It moves you from being a hobbyist to someone who understands the visual language used by top-tier designers and world-class brands across the globe.
Conclusion
To wrap things up, mastering shading techniques is a journey of observation and practice. You start by seeing how light hits the world and then use your pencil to recreate those patterns. Whether you like the clean lines of hatching or the soft look of blending, each method has a special purpose. Do not be afraid to experiment and mix different styles together. The more you practice, the more natural it will feel. Remember to keep your pencils sharp, your highlights bright, and your shadows deep. Your art will improve faster than you think if you just keep drawing every day.
Frequently Asked Questions
What is the best pencil for shading? The best pencils for shading are “B” pencils, like 2B, 4B, or 6B. These have softer lead that makes it easy to create dark shadows and smooth blends.
Can I use my finger to blend? It is better to use a tissue or a blending stump. Your fingers have natural oils that can leave spots on the paper and make the shading look uneven or messy over time.
How do I keep my drawing from smudging? You can place a clean piece of scrap paper under your hand while you work. This keeps your palm from rubbing against the pencil lead and spreading it across the page.
How long does it take to learn these methods? You can learn the basic idea in just a few minutes. However, it takes several weeks of regular practice to make your hand steady enough to produce very smooth and professional results.
Why does my shading look flat? Your shading might look flat because you are not using enough contrast. Try making your dark areas much darker and keeping your highlights very white to create more depth.
Do I need expensive paper for shading? You do not need expensive paper to practice, but smoother paper is usually better for blending. Very rough paper can make it hard to get those tiny details and soft transitions.
I hope this guide helps you feel more confident in your art. Go grab a pencil and try out these shading techniques on a simple shape like an egg or a box. You will be surprised at how quickly your drawings come to life. Happy drawing.